A single sign-onIf you want your participants to log in from an external site, you can implement a LTI Single Sign-On (SSO). It was developed with LTI standards, and by using your LMS's LTI external tool, you can set up your own single sign-on so your users can log in from your system and don't need additional login credentials on LearningStone. The external site is called the “Tool consumer”, while LearningStone is the “Tool provider”. Once someone logins through the external login, they cannot log in in any other way without creating a new account. Trainers, coaches and managers can always log in into LearningStone. If the participant does try to login directly at LearningStone, they will be redirected to your external site to log in and if they want to change their name or e-mail, they will also be led back to the external site as well so that you keep everything together.
|
VersionUse LTI version 1.1 for all connections to LearningStone.
|
Setting up your SSOGo to the LTI configuration in the workspace settings. Here you will find the key and secrete your need to set up the SSO.
Once you have done this and the SSO is up and running, you will need to: - create a groupspace (the actual training or other learning track) - enable LTI in the groupspace settings - copy the LTI link and paste it along with the secrete and the key in the product-fields in your site. - Set the link to open in a new window (not embedded). - Make sure your system is set to pass on both name and email address. As soon as a user tries to log in by following the link on the external site (the tool consumer like Moodle), they will be added to the groupspace as a member. The members name and email will be synchronized every time when they log in It’s that simple!
See below for an example of setting up Moodle for the SSO. |
Adding a memberIf you use an external site as a tool consumer, you never need to add a member in LearningStone (except trainers and coaches). Members are added automatically if they are signed up for a product on the external service. |
What happens when a user gets removed in LearningStone?The external site is leading, so it’s best to not remove members in LearningStone. There are a few scenarios to consider: You moved members to “Access ended” or “Removed”: if the member still has access to the groupspace according to the external site, the member will be logged in but will not have access to the LearningStone groupspace. No data will be lost and it is possible to restore the member by moving it back to “Members”. You deleted the member completely in LearningStone: if the member still has access to the groupspace according to the external site, the member will be added again at the next login via the LTI link but progress data until that moment will be lost. |
What happens when a user tries logging in through LearningStone or recovering a password?If a user who has originally logged in through the LTI-link, tries logging directly in LearningStone, they will be redirected to the external site. The systems users both usernames and email to determine where to redirect to. In some cases there will a choice for the user (either go to the external site they usually use, or enter a password). If the user tries resetting a password, using an email-address originating from an external-site they will receive an email with an explanation. |
Troubleshooting LTI launchingIf the connection doesn’t work. - Check if the LearningStone groupspace is active (not in the archive). - Check if the correct LTI-link has been used in the external site (including https://...) and the LTI-launch has been enabled in the LearningStone groupspace settings > LTI-link. - Check if the link opens in a new window (not embedded) - Check if the product on the external site is active (check if has been published and check the end date). - Double check the settings for your LTI tool settings (see example Moodle below). |
Setting up Moodle for LTI SSOPlease note: we do not provide support for your Moodle configuration. This documentation is here to help you set it up. This documentation is based on Moodle 4.4.2 (LTI 1.1) Step 1. Configure LearningStone workspace settings
Step 2. Create LearningStone groupspace · Create a LearningStone groupspace (this is the training) and go to Settings > LTI login link. Enable LTI and copy the LTI link. Step 3. Add user in Moodle
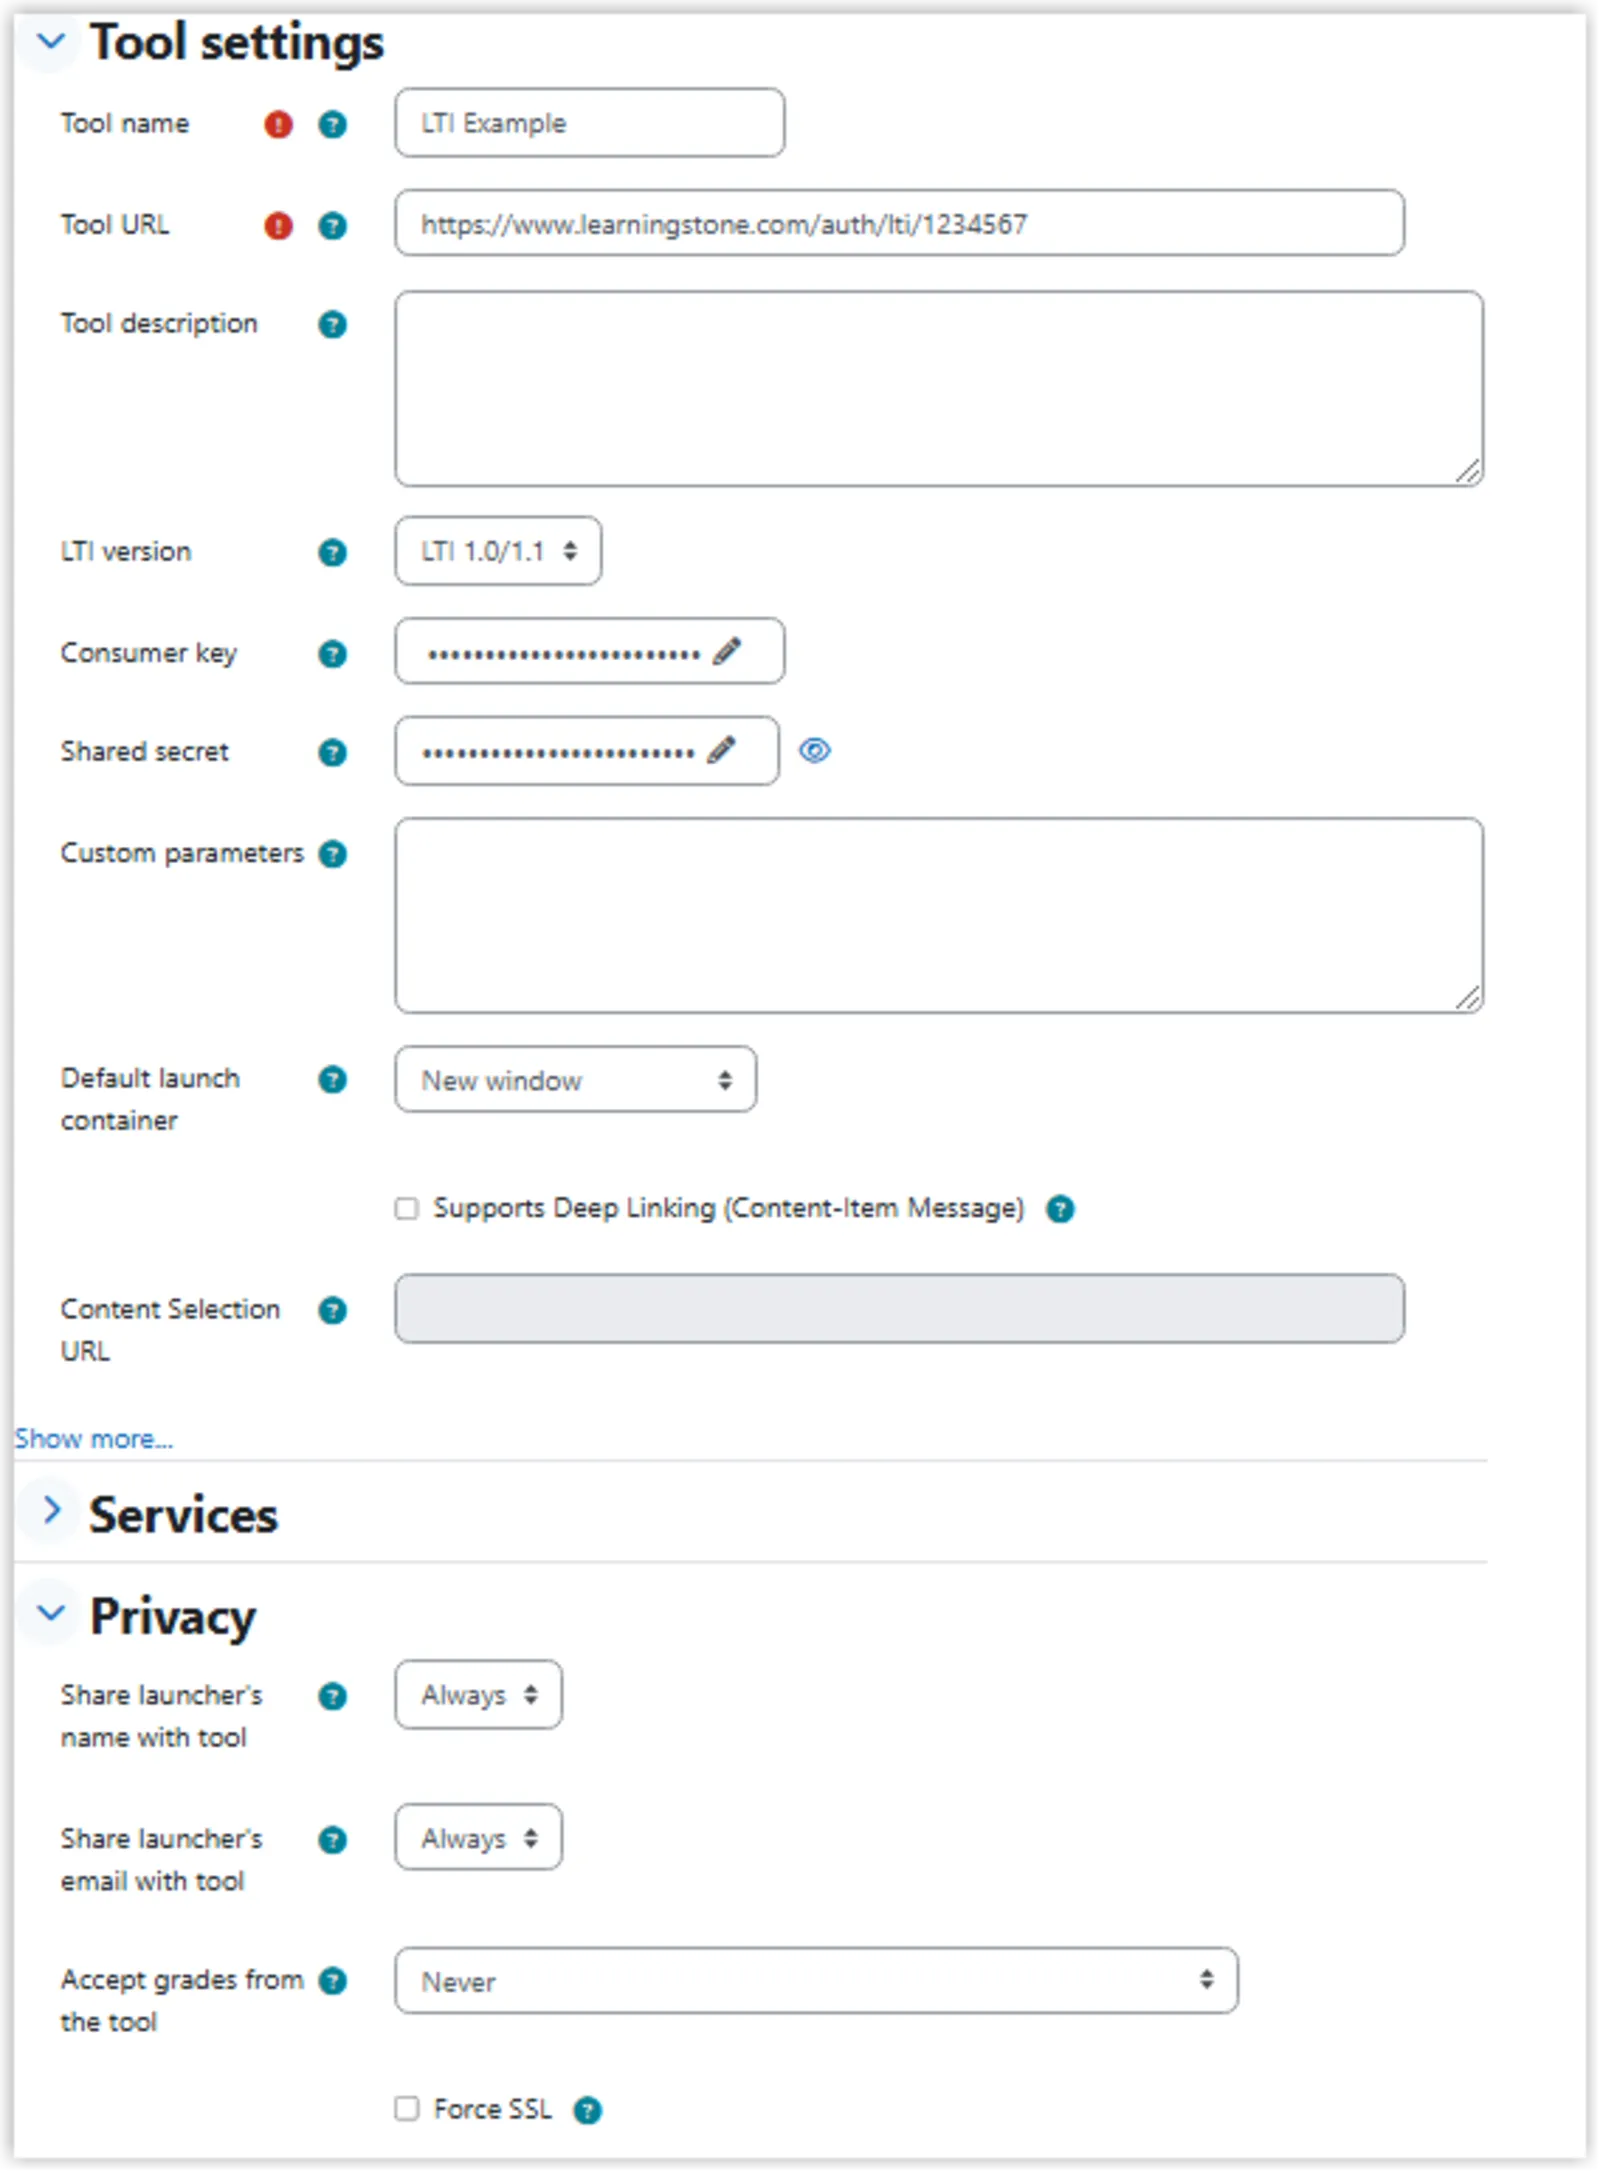
Step 4. Add an external tool in Moodle
Add LTI tool and:
Step 5. Using the LTI tool
|
Moodle external tool settings