|
When reusing course timelines, you need to keep an eye on any scheduling dates. This might be the rescheduling of publication dates (when participants can see or do something) or the scheduling with the “Automatic emails, wall posts, or dialogues” block. |
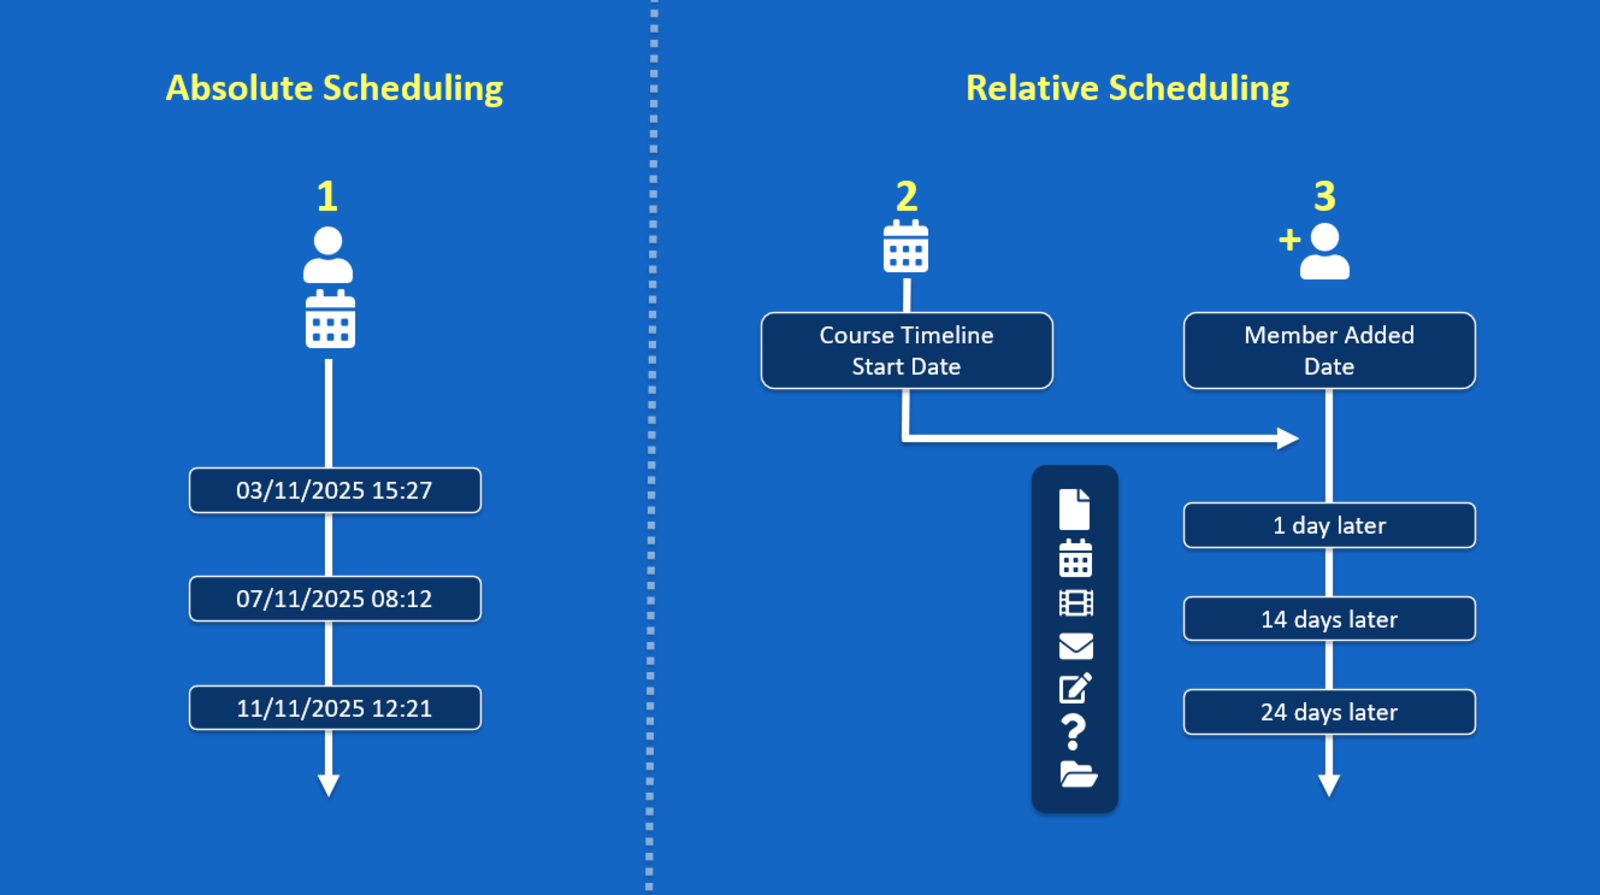
Absolute schedulingSimply fill in the publication dates of blocks to show or hide blocks. Automatic e-mails, wall posts, and dialogues can be scheduled on the publication date too. Pro: you can choose exact times. Con: you need to reset the scheduling for every copy of a course timeline.
|
Relative scheduling based on course timeline start date or date that the member was added.Scheduling content in blocksYou can set conditions for displaying blocks in a section (folder) or any other block that is left-aligned in the editor. The blocks indented below that are displayed x days after the "start date". That start date is a specific date (e.g. January 1, 2025) or the date the member was added. These sub-blocks are displayed from 00:00 on that day.
How to do it1. Open the course timeline settings and fill in a Start date and/or choose Start date is “The date the member was added”. 2. Go to “Display Options” of a top-level block (e.g. a section) and add the condition “Days after Start Date” and fill in the number of days. The subblocks will be shown after the set number of days.
Example – show blocks 3 days after a member has been addedImagine you have a course timeline with a folder with content that you want to show after a member has been in the groupspace for 3 days. 1. In the course timeline settings, choose Start date = “The date the member was added, if that was later than the start date.” You don’t need to fill a date in. 2. Go to the folder with content in the course timeline and choose the tab “Conditional” and set a condition: Days after Start Date = 3. 3. Add Trainee A on May 1st 4. The blocks indented under the section block will be shown on May 4th from 0:00 AM (3 days after the start date).
Scheduling automatic emails, wall posts, or dialoguesYou can also schedule automatic emails, posts, or dialogues based on relative scheduling. Simply add an “Automatic block” to a course timeline and select Scheduled on: “Days after Start Date” and fill in the number of days. The start date can the start date of the course timeline or the day a participant was added to a groupspace (you can set this under the Course timeline settings).
The mails, posts or dialogues are scheduled on 7 AM UTC (Coordinated Universal Time , see what time it is now here), so the exact time depends on your time zone and the time of year. NOTE: If you add members late in the day, the email will be sent a day later as the mail will be sent at least 24 hours later and then at 07:00 UTC. This is because time zones are taken into account in the calculation.
Example – send email after waiting for 1 dayIf a member was added on a Monday and 1 day is filled in, the mail will be sent after waiting 24 hours and then at 7:00 AM UTC, so this will be Wednesday. 1. In course timeline settings, choose Start date = "The date the member was added." You do not need to enter a date. 2. Add the course timeline block "Automatic email" and enter 1 days (and also a subject and content of the email). 3. If a member is added on a Monday, the email will be sent on Wednesday morning at 07:00 UTC.
Automatic emails after 0 days in an existing groupspaceIf you add an automatic email block to a groupspace that already contains members, only members who meet the condition will receive an email. Example: If you add an automatic email that is emailed 1 day after a member is added, then members who were already in the group for more than 4 days will not receive an email. Only newly added members will receive this email.
|
|
|